How to take backup using DriveHQ Online Backup?
DriveHQ Online Backup is a very secure and easy way to backup your essential data. High point security offered by this backup ensures us about the safety of the data. You don’t have to carry other storage media if you are on tour and you require the data. You just need any internet connection, then logon to your account and retrieve the data you want. The DriveHQ headquarter is located in California which is heavily guarded, and this software offers you encryption of data, again a plus for your data security.
The backup process comprises of just three steps;
- At first sign up for the free account of DriveHQ Online Backup.
- Download DriveHQ Online Backup 3.8 client
- Install the client and start the backup process by creating the backup tasks
The steps are more precisely explained in the article below.
Taking the Backup using DriveHQ Online Backup
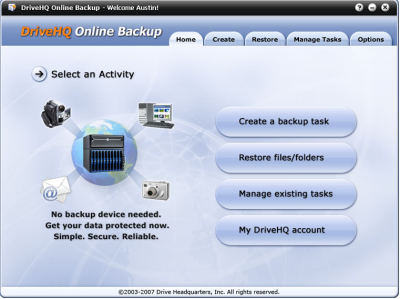
In the main window of the client as shown in Fig.1 you have to click the command button Create a backup task.
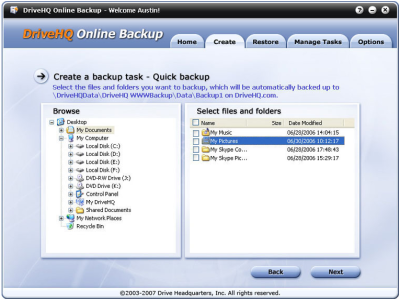
In the Create Backup Task Window you can see two parts as shown in Fig.2. In left part you have to browse the folders, in the right part you have to select the files and the folders. After the selection click the command button Next.
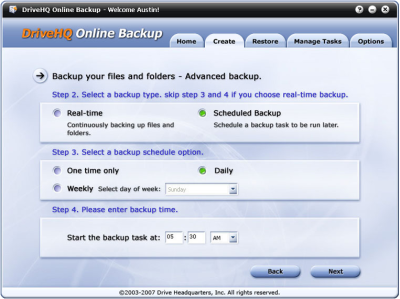
In the next window you can apply schedule to your backup task and also you are provided with Real-time option if selected continues backup of your selected data will be taken. The window is shown in Fig.3;
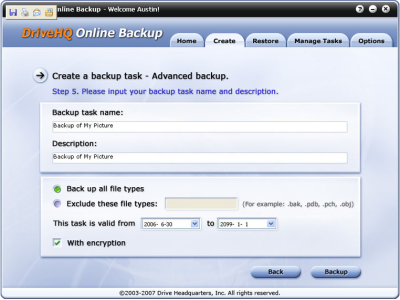
In the next window you have to name the backup task, can apply description to the task, can exclude some file formats, and also apply encryption to the backup process. Shown in window in Fig.4;
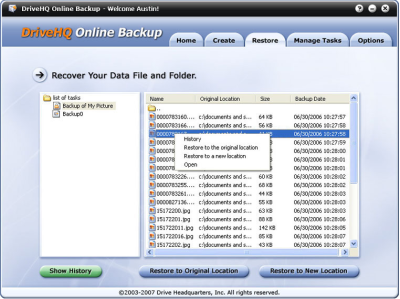
For recovering your data go the restore tab at the top or click the Restore Files/Folders command button in the main window shown in Fig.5;
Due to user friendly interface provided by DriveHQ Online Backup the backup task is very easy and it is just like once you have to set the whole process and become worry free for your important data.

