How to backup your data using SOS Online Backup?
SOS Online Backup software secures your important files off-site. The numbers of computers SOS Online Backup can backup don’t have any limitation. The two most outstanding features of this software are open file backup and continuous backup. The files to be backed up are can be selected in seven different ways. Intelligent Filters puts a limitation to the types of files to be backed up. When you are finished with the file selection you will be shown your total capacity you are going to download. So the plan selection is made quiet easy.
System Requirements for SOS Online Backup
- High Speed Broad band connection.
- For installing the SOS Online Backup Client your PC should be IBM and PENTIUM compatible with processor speed greater than 1000 MHz.
- INTERNET EXPLORER 5.0 and further version.
- RAM 64 MB.
- The Hard Drive Space required for the client is 20 MB.
Taking the Backup using SOS Online Backup
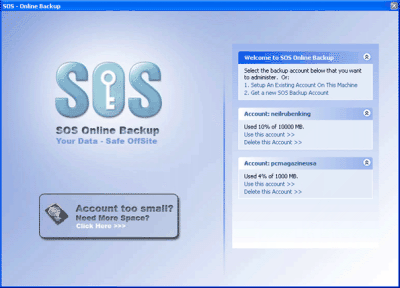
When you are finished with the download and installation of the SOS Online Backup client, in the opening window on right side you have to create your account on the SOS server by selecting the option Get New SOS Backup Account. The opening window is shown in Fig.1 below.
Figure.1 Opening Window
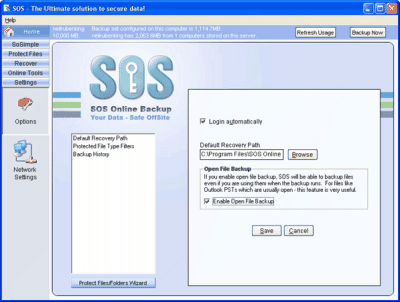
When you have created your account then you have to give the default recovery path in the next window. After you select the path and other required option you have to click the Save command button. The path selection window is shown in Fig.2 below.
Figure.2 Path Selection Window
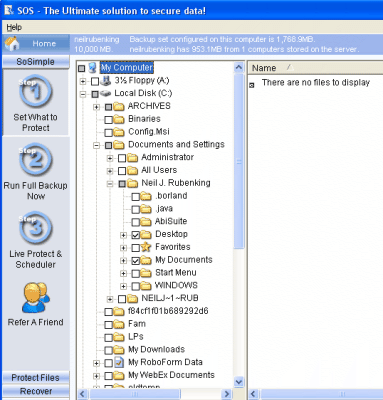
After the path is set in the next window you have to select the files you have to back up. The file selection is done by just checking the check boxes. Select the files you need to back up. The file selection window is shown in Fig.3 below.
Figure.3 Files Selection Window
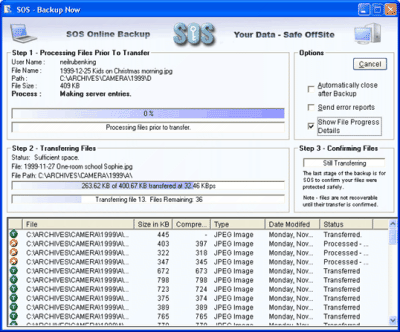
In the next window all the files will be processed and the processing progress bar will be shown to you. The progress bar window is shown to you in Fig.4 below.
Figure.4 Progress Bar window
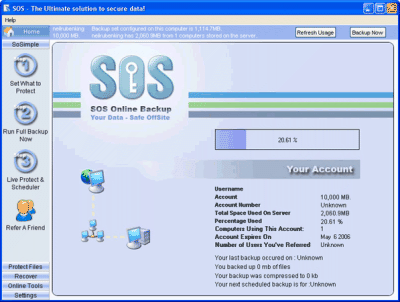
After the processing is over you will be shown your account status. The status contains how much percentage of the total available space you are using. The window is shown in Fig.5 below.
Figure.5 Account Status Window
The scheduling option is available in the settings. You can also schedule your backup. If you want to backup your selected data then click the Backup Now command button shown in Fig.5.
In such way the whole backup process is set. This you have to just set the process once and schedule the process. All your data will be backed up as per your schedule. For recovering the data you have to go the Recover option shown in Fig.5. In the recover option you will be provided with the list of your files backed up. Just select the files and click the Restore command button. All your files will be restored to the location you selected.

