How to backup your files in Windows 7?
There are plenty of backup software for Windows. We can use simple freeware backup applications for backing up the files or complete backup solutions to create different backup types of whole disc partition. What does the Windows 7 operating system offer?
Windows 7 is very close to its predecessor Windows Vista, when it comes to the backup feature. However the are new ways how to run the backup functionality. Lets come to look at Windows 7 backup process.
How to start Windows 7 backup?
The most common way how to start the Windows 7 backup function is to click the Start button and write a ‘backup’ word. The Backup and Restore shortcut will appear. Click it and you will see the Backup and Restore tool.
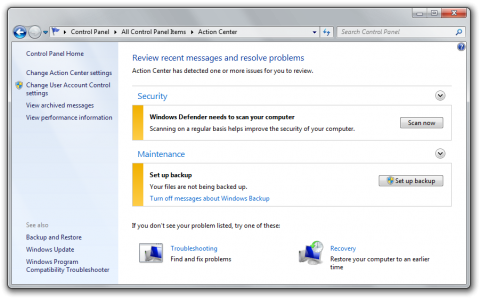
Another way how to run the Windows 7 backup directly is click to the flag icon in system tray. The message panel of new Action Center will appear – with Set up backup link. We can also run the Backup and Restore tool directly from the Control Panel or from the Action Center Maintenance section.
Action Center in Windows 7
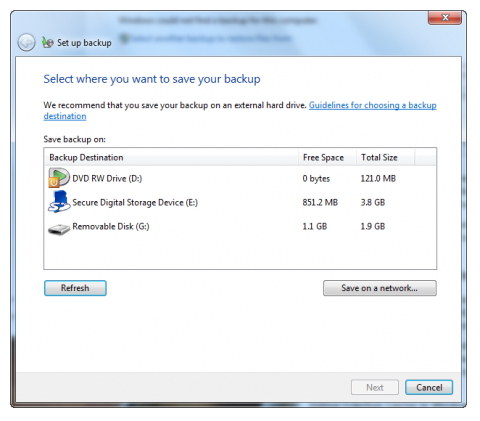
So as soon as you will click the Set up backup button or link (see above) you will see the progress bar and then the Set up backup window will appear. Select the backup destination. You can use the DVD, USB flash disk, USB external drive or the network location. Remember, that you have to click the Refresh button whenever you connect another USB device.
Set up backup windows in Windows 7
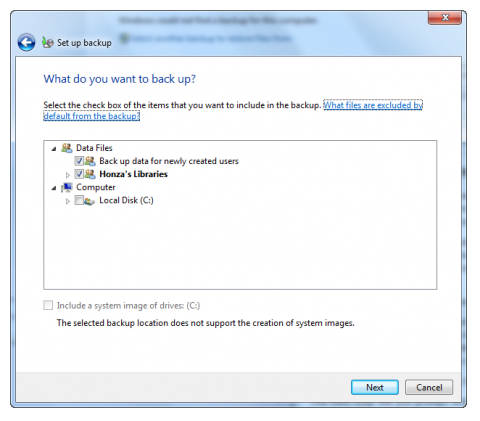
The next step will you prompt with ‘What do you want to backup?’ question. The default backup action will cause the Windows 7 will backup all your data in Libraries (Windows 7’s new specialty), Desktop and Windows folder. I recommend to choose the ‘Let me choose option’ and manually select the folders or Libraries you wish to backup.
Select folders and libraries to backup
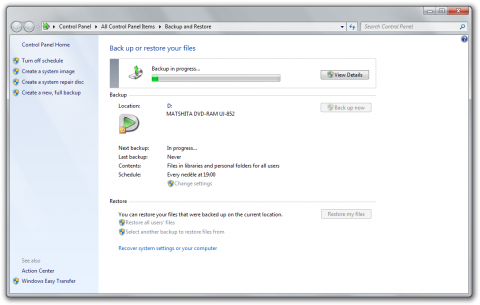
In the next step, click the Save settings and run backup button. The backup process will start. If Windows 7 will need an another empty media you will be prompted with the corresponding dialog.
Windows 7’s Backup and Restore tool in action
More backups in Windows 7? System image.
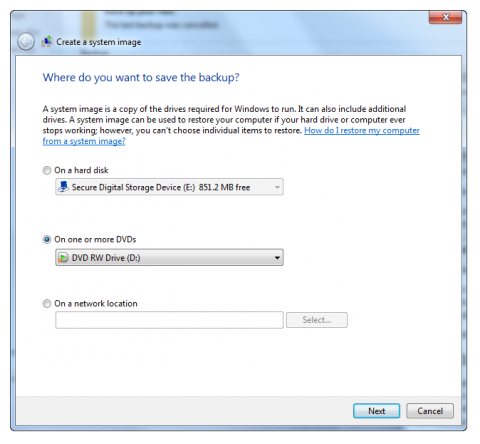
So the standard backup process will burn or copy your files outside the computer. But you can create another type of the backup in Windows 7. Run the Backup and Restore tool from the Control Panel and click the Create a system image link on your left. Now, you can save the backup of the entire disc partition (to the USB external drive or to the some DVDs).
Create a system image in Windows 7
I highly recommend this feature because it will create a complete backup of your disc and you can restore your data from it including the system and all installed applications. However there is no possibility to restore individual files or folders later like in the Acronis True Image.
Create a system repair disc in Windows 7
Don’t remember to create a system repair disc of Windows 7 after you have done the system image backup. The system repair disc contains the boot record and the basic tool you can use to restore the computer from the system repair disc. Burn it to the quality DVD.
Backup scheduler in Windows 7
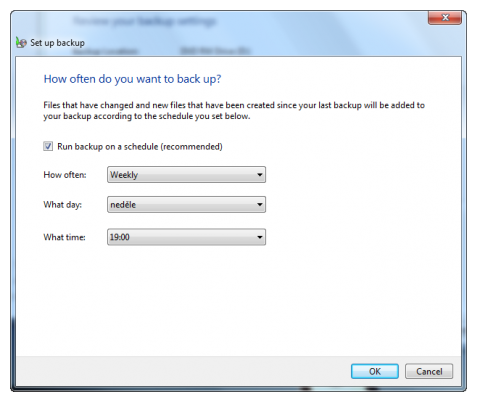
As soon as you will create a backup record, the Windows 7 will schedule the backup process for the next time. You can change it using the Backup and Restore tool from Control Panel. Click the Change settings link, go through the wizard and click the Change schedule on its end.
Change backup scheduler in Windows 7
Keep the schedule option enabled and change how often, what day and what time the Windows 7 backup should be scheduled.
I highly recommend to backup your computer regularly because you never know when the hardware can notice the failure. Windows 7 backup process is very easy to set up and if you will backup through the network (to the NAS server for example), you can set it and forget it.
By the way, if you are using the Windows Vista, check the articles How to backup a Disk Partition in Windows Vista and Guide to Using the Vista Backup System.

