Backup your system data using Sbackup in Ubuntu (Linux)
In today’s Microsoft Windows OS dominated market, Linux OS still has its big fan club. Ubuntu OS is version of Linux. In Ubuntu many times there are system crashes. Also when you have to upgrade the Kernels in Ubuntu OS it is recommended that first you should take the backup of the system. Till now my all articles for backup were Microsoft Windows related. Following article will help Ubuntu users in case if they want to backup there system.
Taking the backup
Step 1
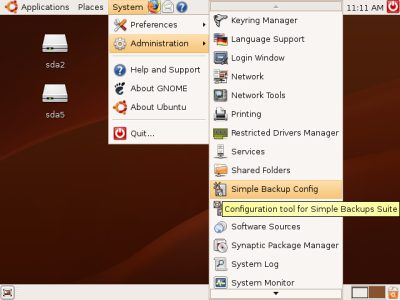
In the main window of Ubuntu follow the path System > Administration> Simple Backup Config as shown in Fig.1;
Figure.1 Path Selection for Sbackup
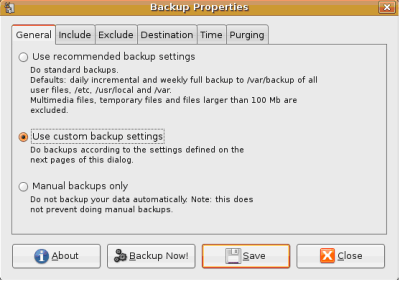
After entering the password your Sbackup application will open as shown in Fig.2;
Figure.2 Sbackup Application
Step 2
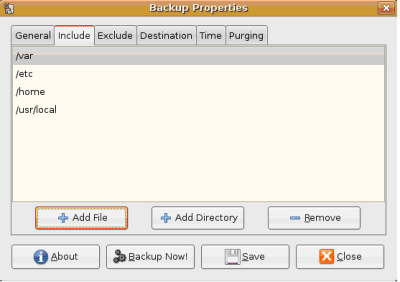
Select Use custom backup settings shown in fig.2. Now select the Include tab and include any directory or file you want to backup. This can be done using Add File or Add Directory button. Shown in Fig.3;
Figure.3 Include Tab Window
Step 3
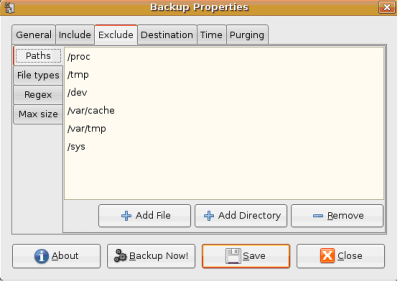
Select the Exclude tab as shown in Fig.4. In this tab you can exclude files and folder you don’t want to backup. The destination for storing the backup file can be selected using the Destination tab. If you want to go for scheduled backup you can set the settings in the Time tab. Purging tab is used to set the time of deletion of old backups to free the disk space. After all this settings click the Backup command button and your backup operation will start.
Figure.4 Exclude Tab Window
Restoring the Data
Step 1
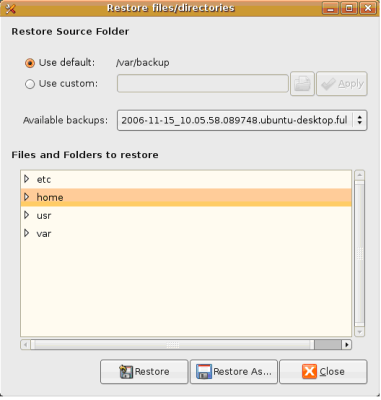
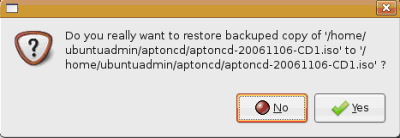
For restoring the data follow the same path discussed in previous Step 1. Only the change is here you have to select the option Simple Backup Restore shown in Fig.5; Select the backup file from the list click Restore the message will pop up as shown in Fig.6 click Yes your files will get restored to there original location.
Figure.5 Restore Files/Directories Window
Figure.6 Restore Confirmation Message
Sbackup doesn’t create a new backup file each time it runs and it creates an incremental backup.

